Why visualize your work flow?
Identifying value is a very important first step for anything with a clear goal. Anything with a vision, mission, or purpose defines value. Visualizing flow is the logical next step. Flow is the movement and delivery of value through any process. Those experienced in manufacturing call this practice “mapping the value stream”. Transparency into the work flow and the work items is necessary to visualize the flow of value.
Think airport arrivals and departures on runways
Airports have lines, or queues, everywhere. Each line has a specific goal, and also a distinct arrival point and a distinct departure point. You can also say that a workflow can be seen as a path to a goal. There are also rules, whether explicit or implicit, that each individual must follow to reach the goal. Also, leaving one system (also known as being “done”), can be the start of another system (or being “ready”). For example, being “done” at a security checkpoint could mean that you are “ready” to proceed to your gate and start progress toward another goal or system.
Here’s another example. Take the arrival and departure systems of planes. The ultimate goal for an arriving airplane is to safely arrive at its assigned gate. However, an airplane on final approach cannot land if the runway is not “ready” to accept the arrival. Additional steps will have to be taken in order for a plane to be cleared to land. Similarly, a plane departing from the gate and cleared for takeoff on a runway must make sure there is clear air space. The arrival and departure of airplanes must have a clear definition of workflow to ensure the safety of everyone. Communication becomes a critical factor in this definition of workflow.
Exercise: Defining and visualizing your workflow
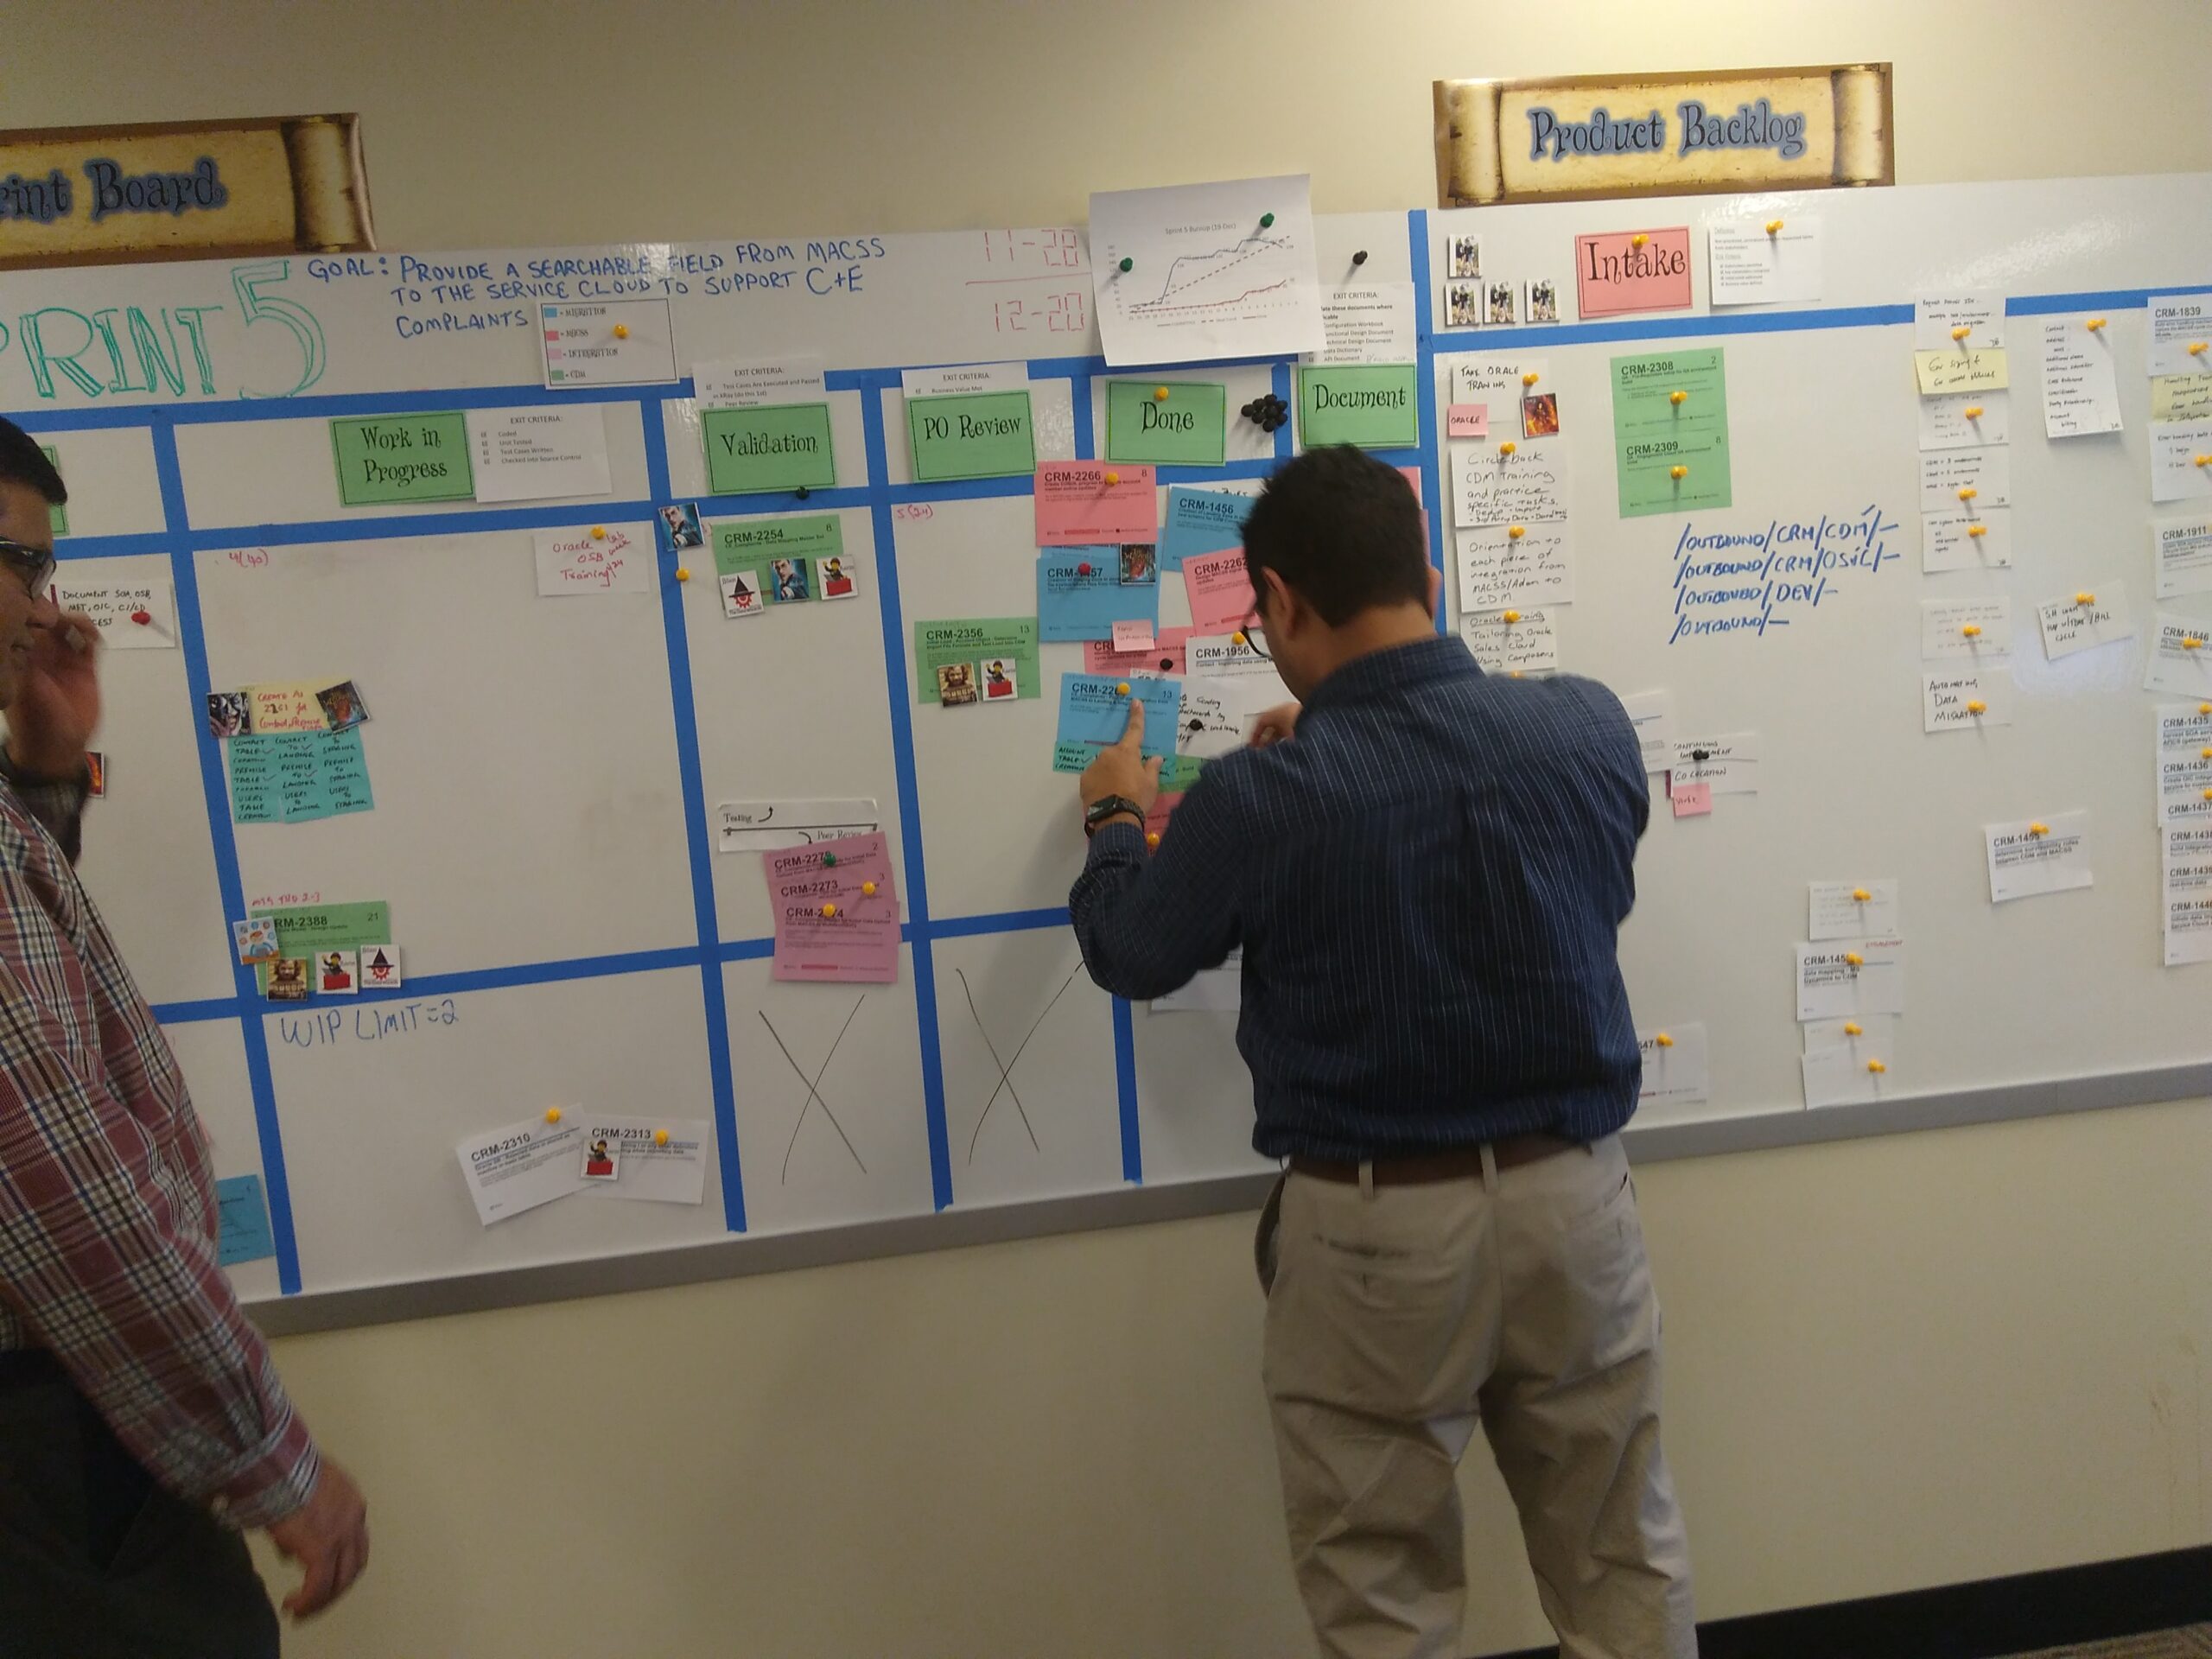
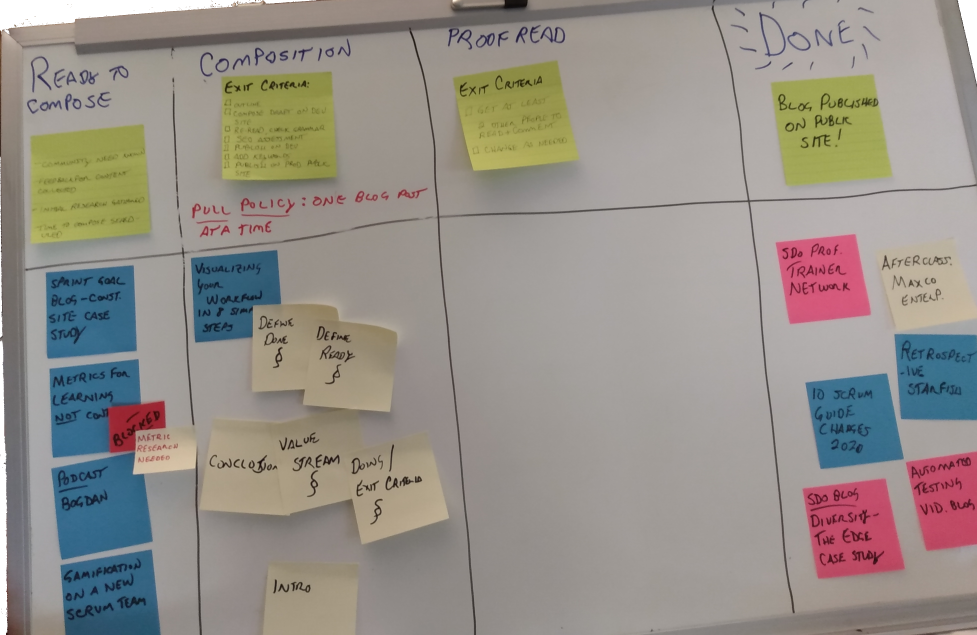
You can define your workflow on a piece of paper, a wall, a whiteboard, or one of many electronic tools. For this exercise, I will be using a whiteboard and defining the workflow to create a blog post. Each stage of my workflow will be indicated by a column on my board.
- Define “Done”
- Form your self-managing team
- Define “Ready”
- Define your value stream direction
- Define “doing” and form some rules
- Define workflow items and place them on your board
- Inspect and Adapt
- Handling exceptions and blocks in flow

Define “Done”
This is your goal. Why are you doing this? What is the purpose of this work flow? How do you identify value?
Indicate done by labeling a column on the right side of your visual workflow. Clearly state your goal under the “Done” label.
Form your self-managing team
The sooner you complete this step, the better your workflow performance and predictability will be. Your self-managing team will be performing all the steps of your workflow from ready to done for every work item. It is up to this team how they form the remaining steps and create the rules around them. Ideal workflow definitions work best as a “pull” system. That is, members of the team will pull work into the system to be worked only when they are ready. This is a fundamental lean principle.
Ideal team sizes are between six and seven members. The team also must have all of the necessary skills to create flow through the system.
The self managing team will be responsible for creating the remaining steps in this post.
Define “Ready”
Defining ready is an essential step that is often missed in the definition of a workflow. “Ready” indicates that a work item has met the minimum requirements to enter a system to be worked. It also indicates that the team has committed their resources to complete the work to get to done and meet the goal of the workflow. Ready is also a pull system. This rule means that the team will only work on the item once it has met its own definition of ready. Any item that does meet not meet the definition of ready will be sent back to the originator or removed from the board. Think of an airplane that cannot land due to high traffic and must circle the airport until it has clearance.
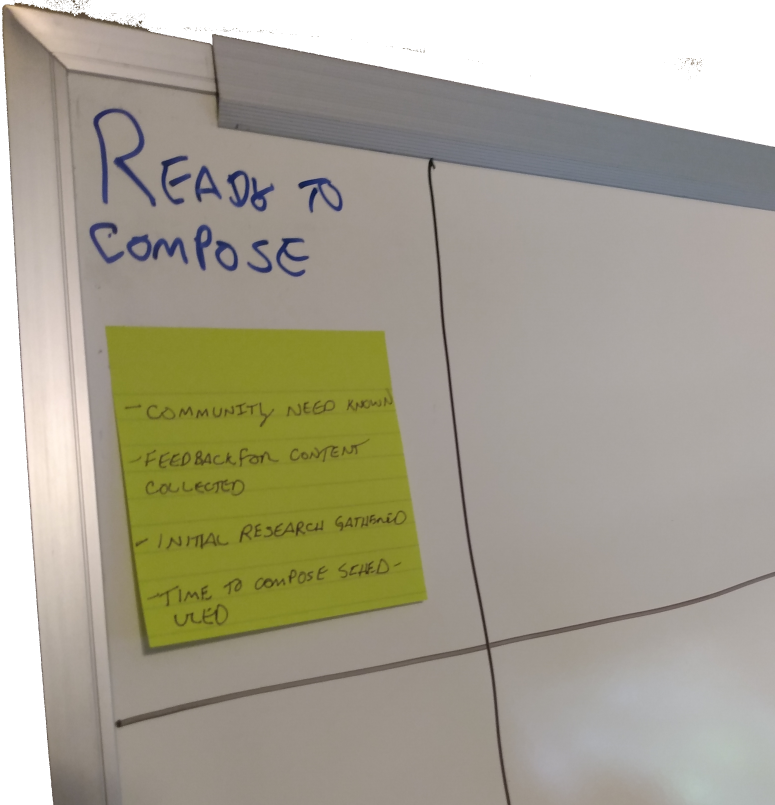
Indicate ready as a column on the left side of your workflow board. Label the column appropriately. This can be “ready”, “entering workflow”, “ready for Sprint”, “Sprint Backlog” or similar. I will use “Ready to compose” in this example.
Clearly state your rules for the definition of ready. This can be a simple checklist, or a sentence indicating the rules to enter this column. This step is very important. Any work item that violates any rule set cannot enter the definition of ready.
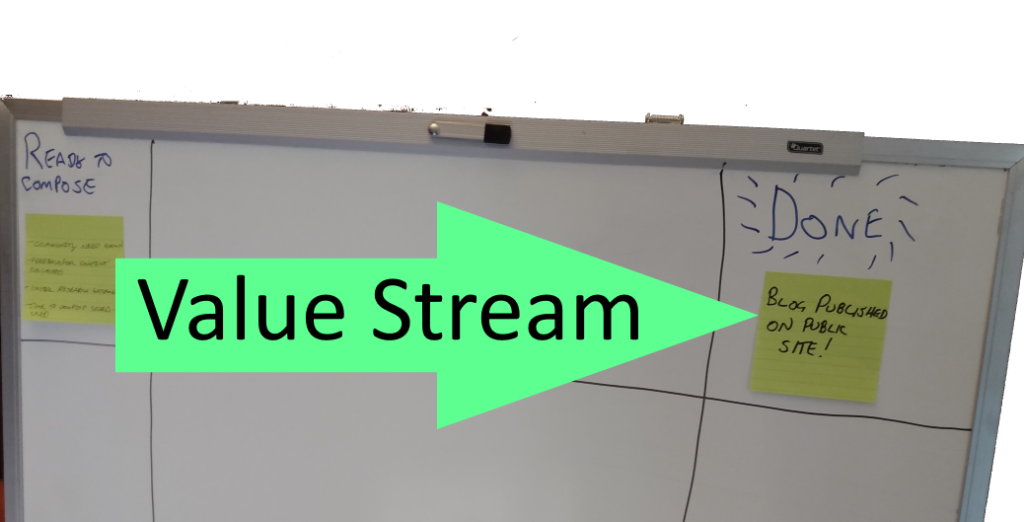
Define your value stream direction
Now that you have defined ready and done, the next logical step is to define the direction of the flow of value. Again, we do not want to make any assumptions. Typically the flow of value is from left to right. Let’s define value this way in our example. The general rule for any workflow is that an item can move forward in the value stream until all the criteria has been satisfied for its current state (or column).
Another important concept to understand is that work items always flow in the direction of the value stream. Work items never move backwards. That is, work items cannot flow in the opposite direction.
Define “doing” and create some rules to move to “done”
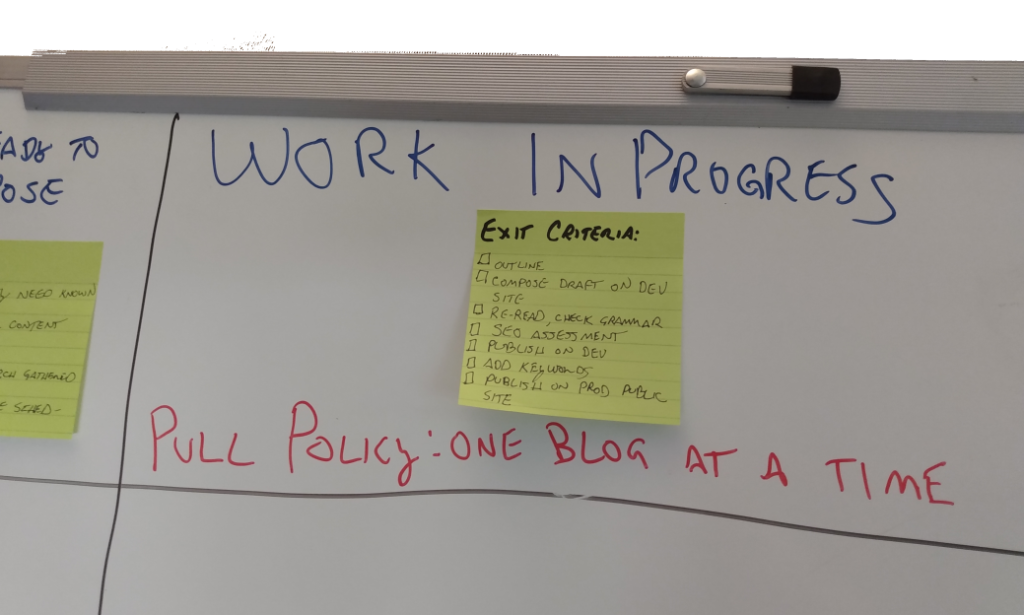
Now it is time to create your “doing” column in between ready and done. You’re “doing” column should be named appropriately. For example, “work in progress”.
Now let’s create some pull policies for this column. Pull policies are explicit policies that must be followed in order for an individual to pull work into this column, assign it to themselves, and start working on the item. Items are never pushed into this column. Individuals always pull work items into this column from “ready” when the appropriate conditions have been met. Pushing also means that no one is allowed to assign work to anyone else. Individuals always assign work to themselves. For this example, I will say that my pull policy is such that I cannot pull work into this column if I am working on another blog post. This means that I can only be working out one blog post at a time.
Similarly, let’s create exit criteria for this column. Exit criteria is a simple checklist of procedures that must be completed for any work item in order for the work item to move to done. Exit criteria can be a combination of explicit and implicit procedures. My exit criteria is shown in the picture under the “work in progress” header. The person working on the item can move the work item to done once an item has met all the exit criteria.
Define workflow items and place them on your board
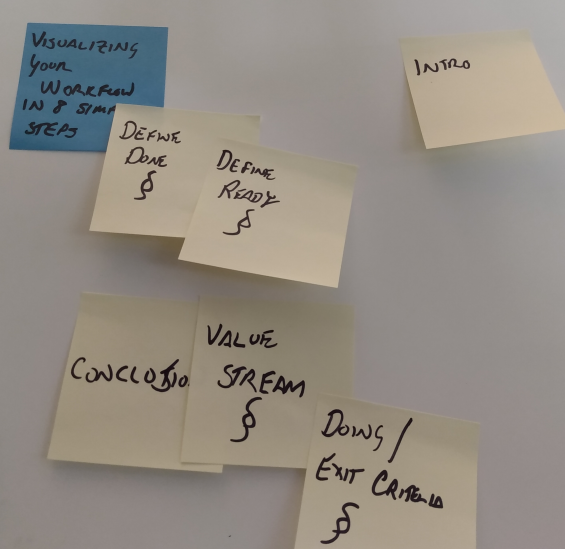
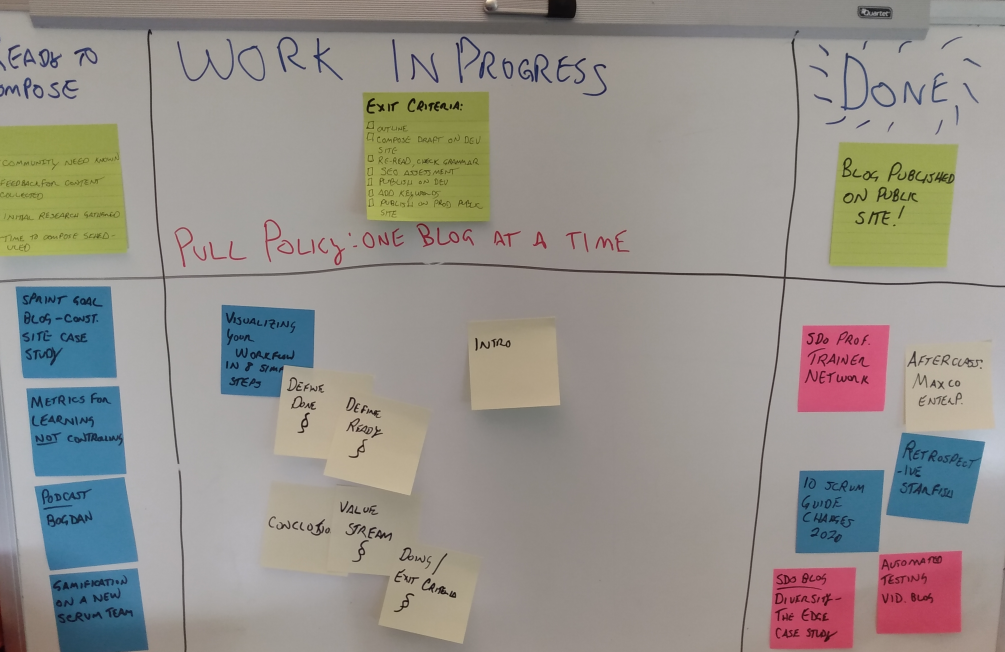
Creating work item content should follow one rule: simple. This is you’re at-a-glance information for each item. Usually just some identifying information is good enough. For my example, a title will be sufficient. Some groups I work with also include an ID from work tracking software, a subsystem, and sometimes a full user story. Assigning a color for each work item type is also very helpful.
Place all of your work items on the board as appropriate. You will then see at a glance your workload and what you have accomplished. This step is usually where people working on something will immediately see the value of visualizing workflow.
Inspect and Adapt
The above steps define making our work transparent. Take some time to move work items through your workflow to understand the policies that you have set up for work entering your workflow and the exit criteria you have established to move to done. As a team, you will then see some improvements that can be made to your flow . This is the inspection and adaptation phases of the workflow.
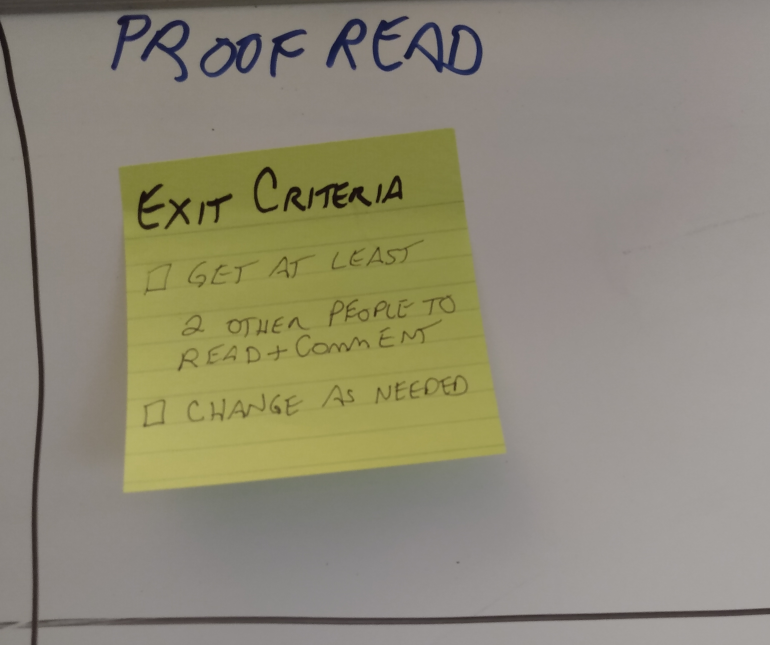
You might want to add stricter quality standards to your workflow. In my example, I will add a “proofreading” column that lives between “work and progress” and “done”. Done means that a item is published. I want other individuals to look at my post to check for grammar, spelling, and problems. I will also modify my “work in progress” column to say “composition”. These two modifications give a clear definition of my workflow for posting blogs.
Inspecting your workflow and adapting new policies and rules should ideally be ongoing and iterative.
Handling exceptions and blocks in flow
Of course, flow through the value stream is usually not perfect. Exceptions can happen. One rule that we have in our workflow is that items cannot move backward in the value stream. So when problems happen, what do you do?
Sometimes the explicit policies that we set to move work items to done fall outside our checklist. This is an example of a work item exception. Note the exception and remove the item from the workflow. When we inspect the workflow in the next iteration, we might handle the exception differently. The important step here is to note that an exception happened and never reached “done”.
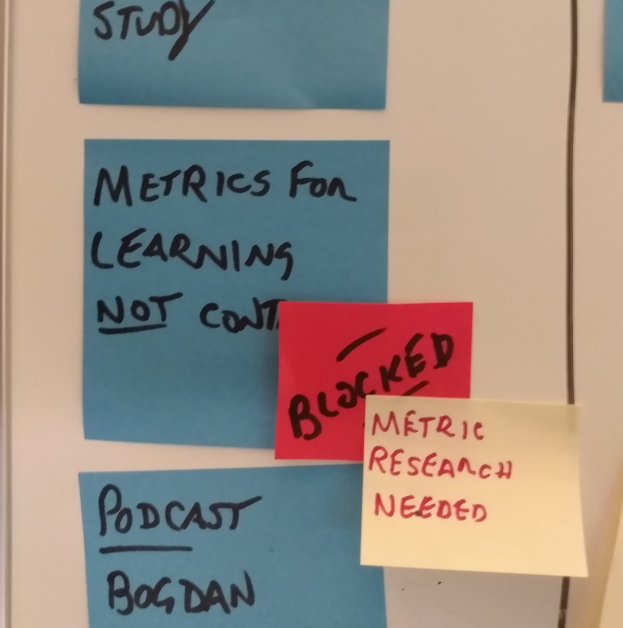
Sometimes an item is blocked. Blocked items mean that the flow has temporarily stopped . The idea here is to explicitly show these items in our workflow to bring attention to them for the purposes of removing the blocker. An example of a blocker in my blog post writing process is where I need to research details in my blog content. I will indicate this impediment in the blocked reason on the work item. Blocked items are explicitly indicated as “blocked” on our definition of workflow.
Conclusion
Visualizing your workflow allows a team to transparently visualize the rules and principles behind the way it works. Transparency is the first step to empirical process control. We need transparency in order to inspect our workflow and adapt new rules, policies, and principles to the workflow to make it fully empirical. We can also see how value flows to our stakeholders.